Install Exchange PowerShell V2
Get the benefit of new Cmdlets
The new EXO V2 module for PowerShell enables you to connect to Exchange online using native Multifactor authentication. It also uses better cmdlets to manage your subscription. Ready to install it ? Follow this quick guide
PowerShell offers many advantages when it comes to manage Exchange 365 but with great power comes great responsibility, and many tasks should be done with elevated privileges, so use it with care and understand what you do ;-)
The below guide assumes you have properly setup your system as to use Transport Layer Security (TLS) 1.2 or higher, as since April 2020 the PowerShell gallery no longer supports TLS versions 1.0 and 1.1. If your system isn't properly setup, use the following command to ensure the use of TLS 1.1
[Net.ServicePointManager]::SecurityProtocol = [Net.SecurityProtocolType]::Tls12
Start PowerShell
Start PowerShell as administrator
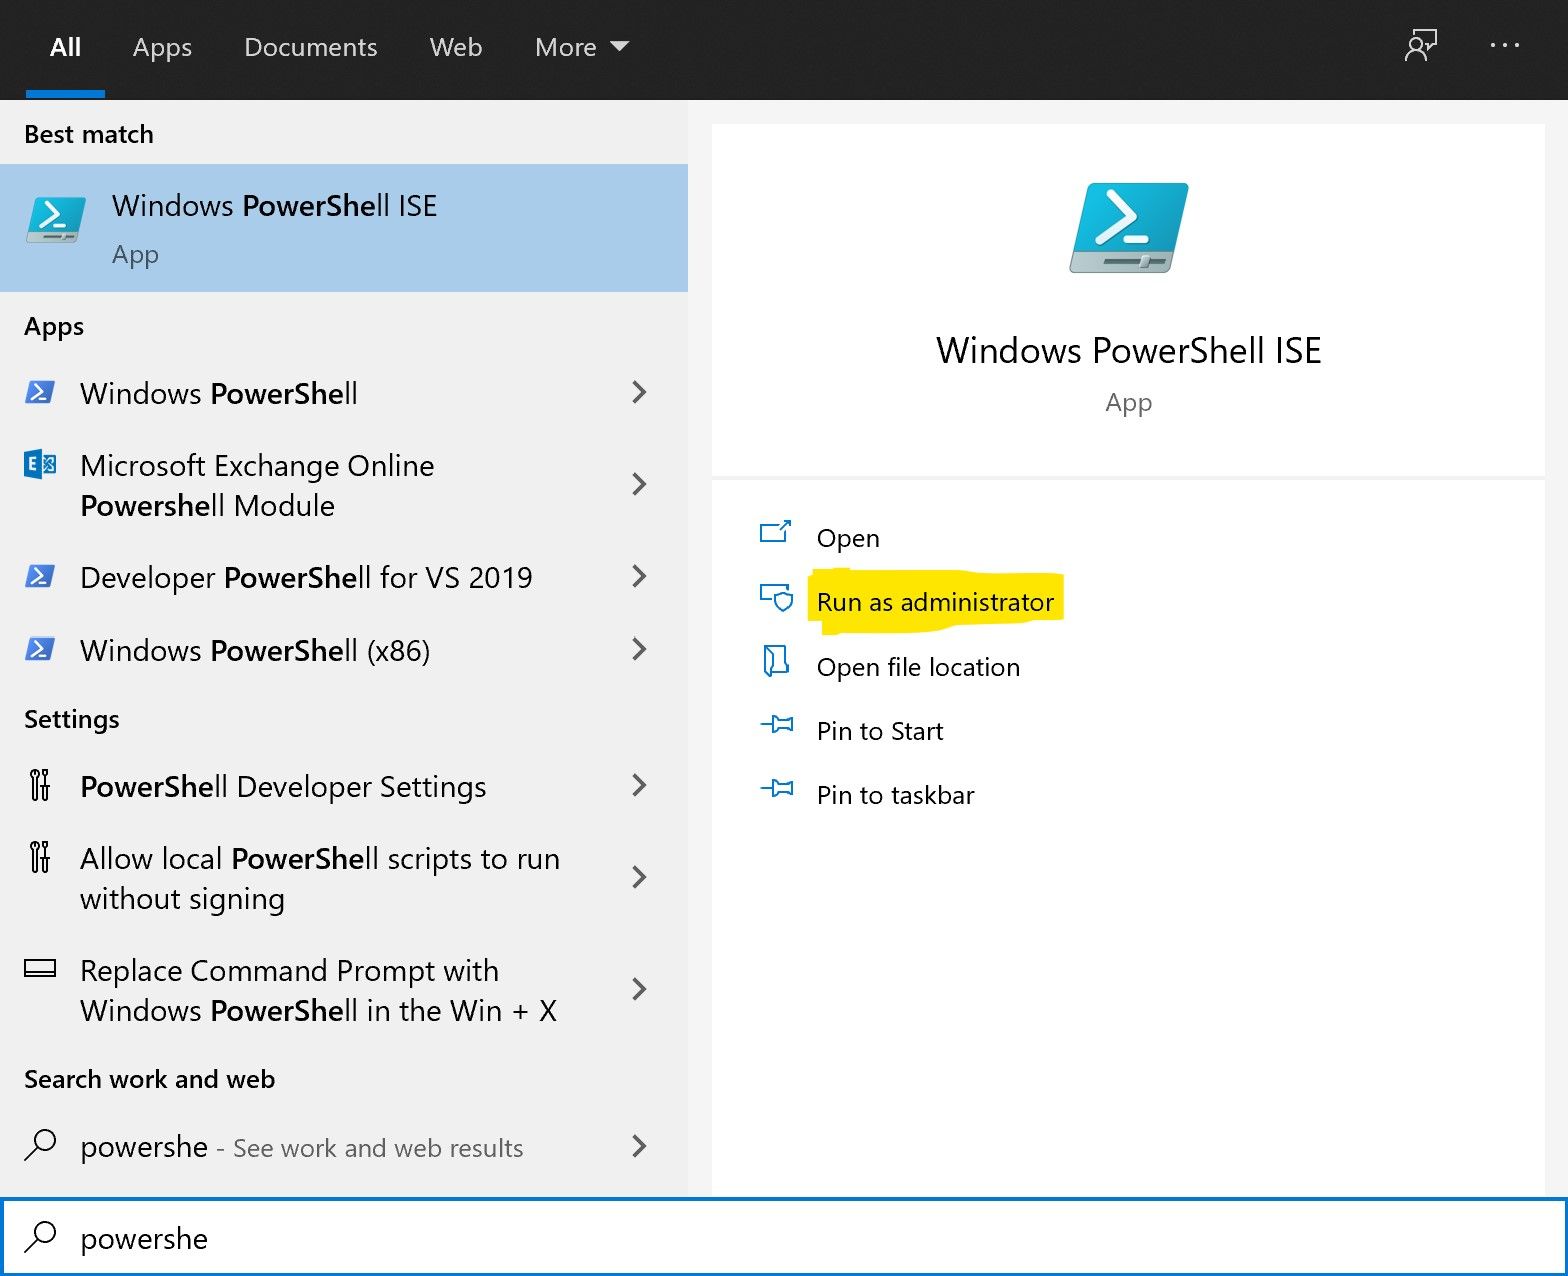
Click on the Start Menu, search for "Powershell" and click on "Run as administrator"
You can use either the "classic" version of PowerShell, or use "PowerShell ISE". I'll use that second one, as it comes with a very handy scripting pane.

Install the module
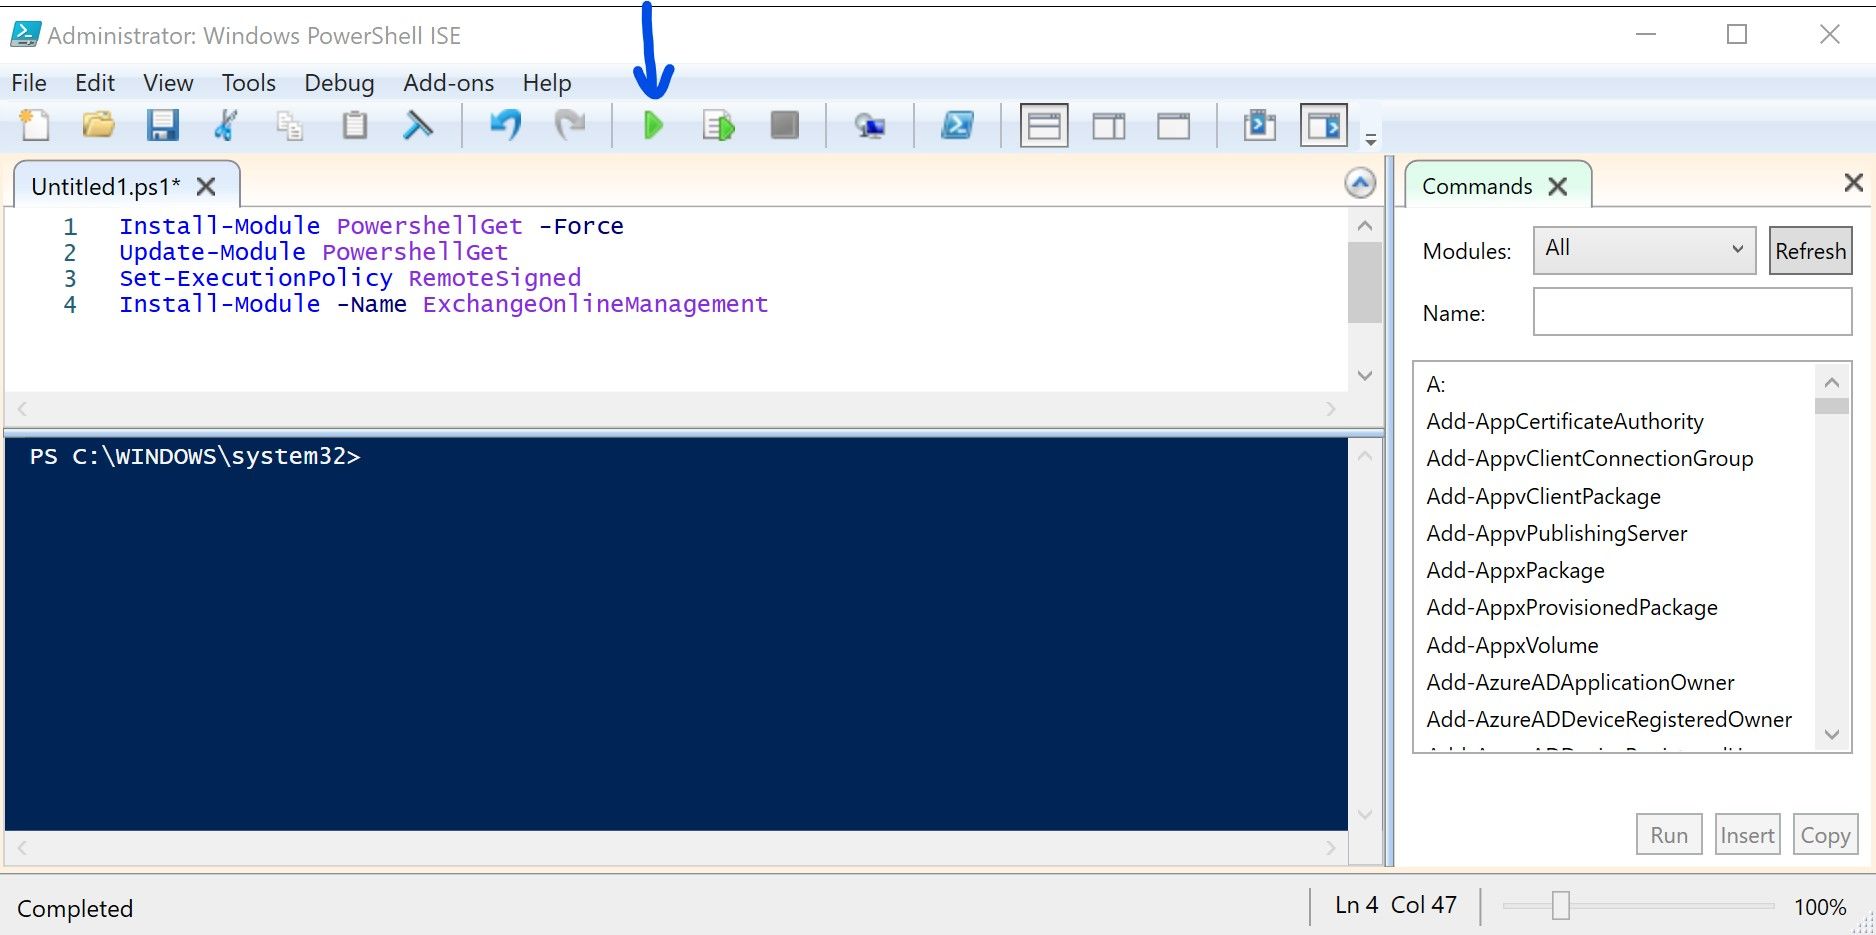
Easy way: just copy paste the below code in the scripting pane and click on the green arrow to run it.
Install-Module PowershellGet -Force
Update-Module PowershellGet
Set-ExecutionPolicy RemoteSigned
Install-Module -Name ExchangeOnlineManagement
The two first lines are installing the latest version of the Powershell Gallery, the third one allow signed scripts to run and the last one installs EXOV2 module.
The above commands can also be ran one at a time.
